
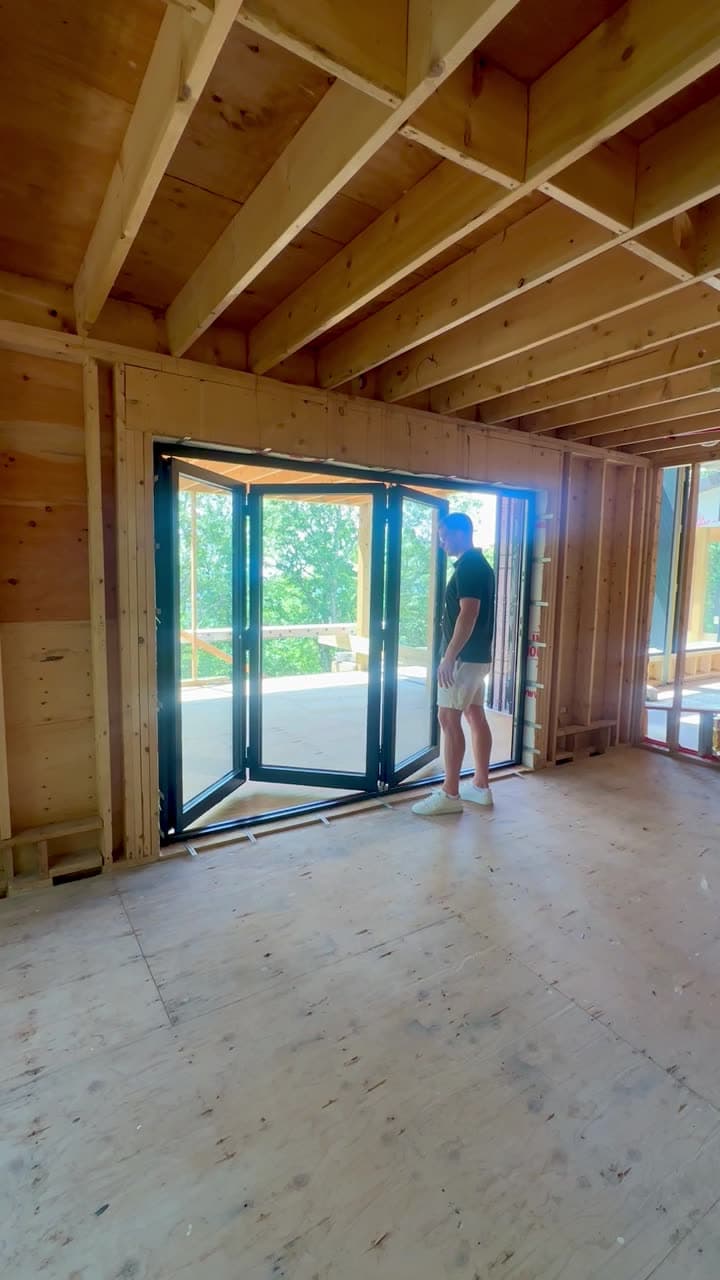
Folding doors set in their framed opening on the Black Rock Residence project, before the floor finish went down.
To install a bi folding patio door, confirm the opening against the shop drawing, level and seal the sill, set the frame plumb and square, fix it at the spacing on your shop drawing, hang the leaves from the jamb outward, adjust until the gaps are even, then make the final hinge fixes and seal the perimeter. A trained window and door crew can do it, and on a bifold I source, installation is your local team's scope.
This guide is for exterior glass doors. The step sequence, spacing and tolerance figures come from four published installation guides for other aluminum bifolds, because the fabrication manuals for the systems I source are not public. They show the shape of the job; the shop drawing and the instructions supplied with your order govern yours.
How Is a Bifold Patio Door Different From a Closet Bifold?
Leaves in the bifolds I source reach 265 lbs, and on the ConceptFolding 77 and Panorama they roll on the sill, while one common closet hardware kit is rated to 75 lbs per panel and hangs from a wheel hanger. If you are hanging a closet door, follow your kit's instructions; the steps below will not apply.
| Item | Interior closet bifold | Exterior aluminum bifold patio door |
|---|---|---|
| Panel weight | Up to 75 lbs in one common kit | Up to 220 lbs (Panorama) or 265 lbs (ConceptFolding 77, Fold Line HD) |
| What carries the weight | Wheel hanger, with a floor bracket at the bottom pivot | Bottom rollers on the ConceptFolding 77 and Panorama |
| Frame | Track fastened in the opening | Thermally broken perimeter frame anchored to the structure |
| Water and air | Not part of the job | Sill drainage, flashing and an air seal are part of the job |
Bottom-rolling hardware is why sill level is critical on these doors. Sizes, panel counts and fold options are in my system guide with panel counts and leaf sizes.
What Has to Be Ready Before the Door Arrives?
Five things have to be settled before delivery, and the first four are settled before the order:
- The header. Your structural engineer sizes it before the door is ordered. Building load must not transfer into the door frame.
- The rough opening. On the bracket-mounted detail in my rough opening guide, that is the frame size plus 1/2 to 3/4 in per side. Published direct-fix bifold guides allow less: 1/2 in, 9/16 in or 10-15 mm (about 3/8 to 5/8 in) overall. Your shop drawing carries the number.
- The finished floor height, inside and outside. One published guide measures overall frame height from the bottom of the sill, not the finished floor, so the floor build-up has to be known when the frame is sized.
- The threshold and sill detail. Your architect and installer own floor drainage, and I confirm the sill on the shop drawing.
- The lift. Know how each leaf gets from the truck to the opening. One published guide lists vacuum cups; for a 265 lb leaf, agree crew size, equipment and a lifting plan with your installer.
Fixing materials are the installer's call as well, because they depend on the wall.
How Do You Install a Bifold Patio Door in 10 Steps?
Install a bifold in this order, from the sill up and from the jamb outward:
- Inspect the delivery. Check every crate against the delivery note before it comes off the truck, and find the leaf numbers and the interior side of each leaf.
- Survey the opening. Run the same 3-width, 3-height survey as on a slider, then mark a laser datum on both jambs and measure down to the sill and up to the head at left, center and right. Opening diagonals should be within 1/8 in. Correct the framing now.
- Prepare the sill. Install the sill pan or drainage tray so it drains to the exterior, and seal it along its length and across both ends. The 2021 IRC (R703.4) sends door flashing to the manufacturer's instructions, the flashing maker's instructions or an approved method, and requires pan flashing at the sill where no instructions exist. Confirm your adopted code.
- Assemble the frame, if it ships in pieces. Seal the corner joints and the threshold ends so water cannot escape past the jambs.
- Set the frame. Give the bottom rail continuous, level support and pack the frame at the fixing points so it stays straight. Jambs must be vertical in both planes with no twist, and frame diagonals within 1 to 2 mm (about 1/16 in).
- Fix the frame. The guides I read put the first fixing within about 6 in (150 mm) of each corner and the rest no more than 20 to 24 in (500-600 mm) apart, closer where loads or your shop drawing require. That is tighter than the 24 to 30 in I give for window brackets. Bracket or through-frame fixing follows your drawing. Seal each hole, do not over-tighten, and leave no screw head proud, because it can foul the guides.
- Hang the leaves. Hang the first leaf on the jamb hinges. For each next leaf, lean it in, seat the bottom rollers in the track, engage the top of the leaf and connect the hinges. The flat-pack guides hang unglazed leaves on machine screws first; if your leaves arrive glazed, follow your system's document for hinge fixing and lifting.
- Glaze, if the glass ships separately. Set the glass on setting blocks, toe and heel, so each leaf stays square, and keep every block clear of the drainage holes. I confirm per order how your leaves ship.
- Adjust. Close and lock the door, then adjust until the gaps at the top, bottom and between leaves are even and parallel. The target gap is on your system's documents.
- Final fix and seal. Add the final hinge screws only after glazing and adjustment. Fill the perimeter with low-expansion foam, which never replaces the fixings, and mask the finish, because foam stains it. Then tape into the weather barrier outside and the air barrier inside using the taping sequence for bracket-mounted units, fit the catches and seals, clean the track, and run every leaf and lock.
Hand the operating and maintenance instructions to the owner at the end, and tell them to keep both tracks free of debris.
Which Threshold Changes the Install?
The flush option changes the install most, because it gives up the weather ratings. The ConceptFolding 77 brochure lists four sills, and these are its European test classes, not US ratings:
| Sill | Air | Wind | Water |
|---|---|---|---|
| Flat Bottom | Not applicable | Not applicable | Not applicable |
| Low Threshold, 3/4 in (18 mm) rise | Class 2 | Class B2 | Class 4A (150 Pa) |
| Double Weather Seal | Class 2 | Class B2 | Class 5A (200 Pa) |
| High Performance | Up to Class 4 | Up to Class B3 | Up to Class 9A (600 Pa) |
A flat sill with no water class leaves the job to the overhang, the slab detail and the drain, so your architect should decide that before the order. Fold direction matters too: the shop drawing shows which face of the frame goes outside. In the published guides, track drain holes face the exterior; confirm on your drawing.
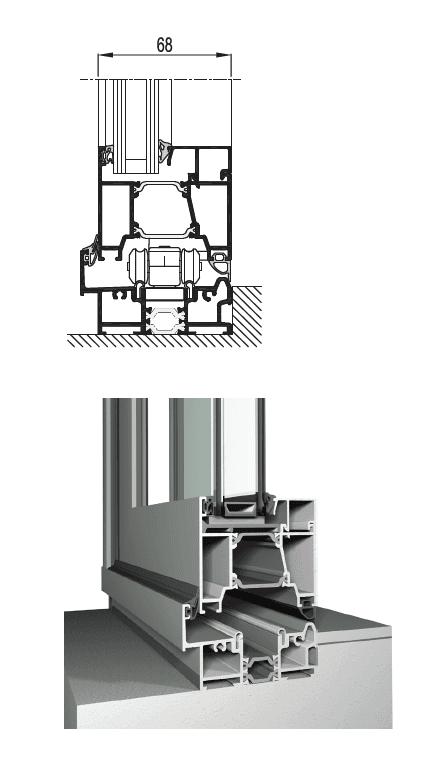
ConceptFolding 68 section, provider image, with the bottom frame seated on the floor build-up.
Where Do Bifold Installs Go Wrong?
Bifold installs go wrong at five points:
- A sill out of level. Leaves drift and bind.
- A header resting on the frame. A frame carrying building load will not stay square.
- Blocked drainage. Packers, sealant or the substructure can close the drain paths.
- Final hinge screws too early. They lock in an adjustment you have not finished.
- High-expansion foam, or foam alone. High-expansion foam can bow an aluminum profile, and no foam replaces the fixings.
Who Does What on a Bifold I Source?
I supply the door and the drawings, and your local team owns the site. The shop drawing I send fixes panel count, fold direction, stack side, threshold and frame size for your confirmation, and I answer questions on anchoring and threshold details during installation. Your structural engineer owns the header; your architect and installer own floor drainage and the sill detail; your local team owns unloading, lifting, installation, flashing, air seal and adjustment.
Follow the instructions supplied with your order: my written warranty excludes installation that departs from them, and it covers the product, not removal or reinstallation.
FAQ
How do you install a bi folding door on a patio? Level and seal the sill, set the frame plumb and square, fix it at the spacing on your shop drawing, hang the leaves from the jamb outward, adjust until the gaps are even, then make the final hinge fixes and seal the perimeter. A closet bifold follows its own kit instructions.
What is the rough opening for a bifold patio door? For a bracket-mounted European door, the frame size plus 1/2 to 3/4 in per side. Published direct-fix guides allow as little as about 3/8 in overall, so the shop drawing for your door carries the actual number.
How many people does it take to install a bifold door? One published guide for a 3-panel door says at least 2 people. Leaves in the systems I source are rated up to 220 or 265 lbs depending on the system, so agree crew size and lifting equipment with your installer before delivery.
Does the weight of a bifold door sit on the top track or the bottom track? On the ConceptFolding 77 and Panorama it sits on bottom rollers. For the other systems, I confirm the hardware on the shop drawing before you size the header and sill.
How much does it cost to install a bifold patio door? Installation is your local team's scope and I do not price it. Ask your installer to quote from the shop drawing, including the lift. Supplied prices are in my bifold door price guide by opening size, and choosing between folding and sliding compares the alternative.
Planning a bifold? Send me the drawings or the opening in inches, the wall build-up, the floor heights and how the leaves get to the opening through the quote form, and I return a budget and the system that fits. For a first number, run the size through the estimator.
Kai, your window guy!